Anyway, if you want to open your StarTAC, here is how to do it.
First, remove the battery and the SIM, then extend the antenna. You'll
see that there is a sort of screw in the hole where the antenna fits. You
obviously can't use a screwdriver, since the antenna itself is in the middle
of the screw. You have to use a pair of scissors, or a pair of little screwdrivers,
or any sort of tool that can fit in the two little slots in the screw,
without possibly damaging it, since it's made of plastic.
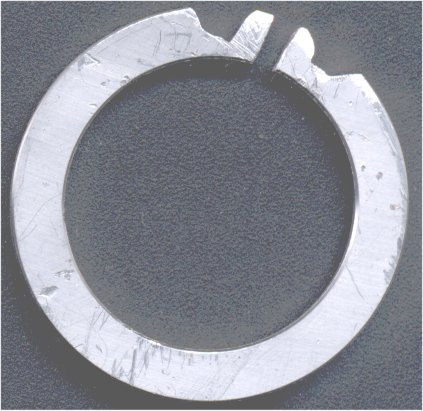
Update: I instead modified a metalling ring (taken from a old/broken hard disk), in order to build a tool that can help me with all these Mot phones that lock the antenna like this. - Stephan
Once you've unscrewed this, you can pull out completely the antenna
and the screw.
Next, you have to remove the two little Torx (sp?) screws on the back
top of the phone, one near the antenna and one near the LED. It's better
to get the proper screwdriver, but a little flat one should work fine (it
worked for me).
Update: Torx screwdriver are available in nearly all country. I live in a very small town in nord Italy, but I haven't no problem to find one in the first shoop I looked. I stronly suggest you to buy one (or maybe the 3/4 models that are most usual), paying attention to the models that have a little hole in the center (the most compabible with all type of screws out of there). The one you need here is the T6 . - Stephan
Once you've removed these two little screws, slide the back of the phone
in the direction of the antenna (that's UP, if you hold the phone with
the SIM slot down). The back should move a half centimeter, and then you
can pull it away (carefully). No cables are connected to the back shell,
so you can pull it away easily.
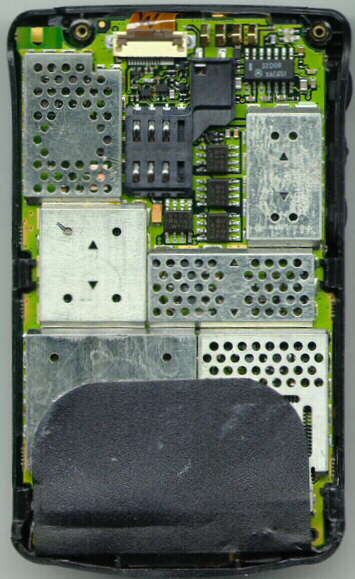
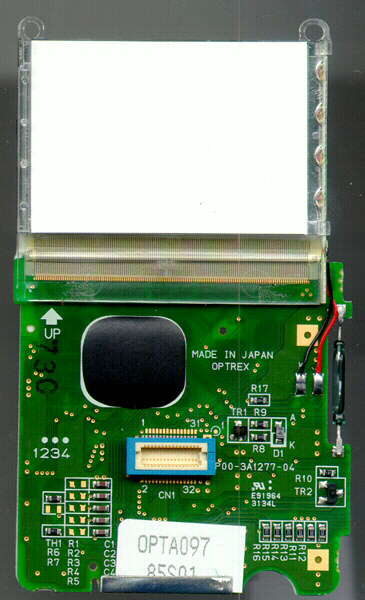
Now you're looking at the radio board from the back (see photo).
You can see the SIM card reader and the radio parts, all shielded with
soldered shields (that I did NOT remove). To proceed, you have to pull
the four plastic hooks that lock the circuit board into its place (using
a little screwdriver) and lift the circuit board a little.
Warning: the flat cable on the top is quite hard to remove, so I didn't
remove it. You can remove the radio board also without disconnecting this
flat cable, pay attention not to pull it too hard.
Update: The little flat is locked on the socket. I strongly suggest you to remove the flat in order to work in the safest way possible. Here you can understand how unblock the flat. - Stephan
Beneath this board, there is the keyboard and display circuit board,
that is connected the radio board by a dual-in-line VERY LITTLE connector.
It gave me no trouble at all, anyway.
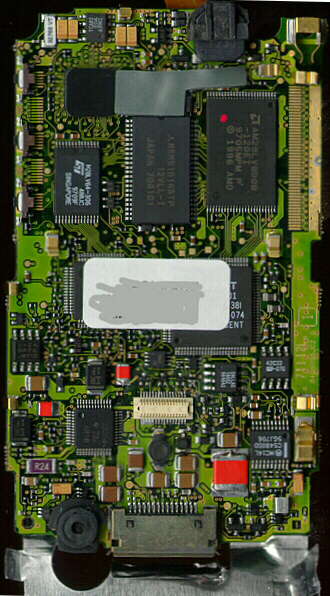
The radio board has a shield on the front side, that I removed to take
this photo. Warning: the plastic (but metallic
coated) little pipe that cointains the antenna is glued to the shield,
so be careful when removing the shield, you have to remove the pipe too,
by pulling it out of the two copper hooks that connect it to the electrical
ground.
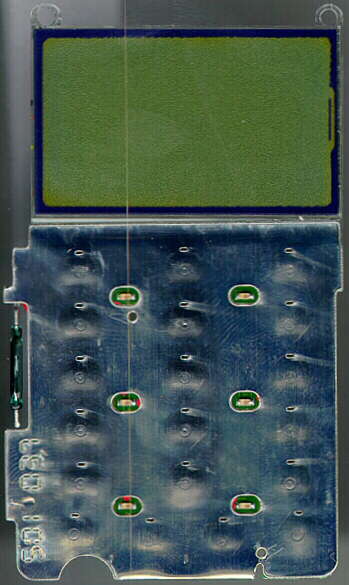
The keyboard and display board can be removed by simply pulling it
away. Be careful since the display is REALLY thin, and I presume it's also
really easy to break it. Here you can see the photos of the
back
and the
front of the keyboard and display
board.
To re-assemble the phone, simply follow the steps backwards, paying attention to align the boards correctly.
Kurgan and Stephan
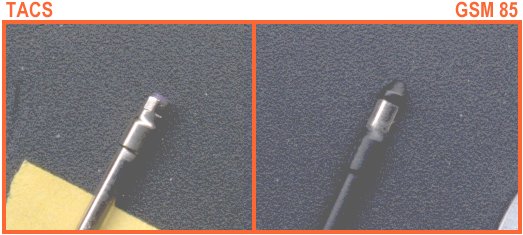
P.S. Some friends of mine insist pretending that a StarTac TACS antenna is the same as StarTac 85.. it's a NO-NO! Look here to see how to distingue them (it's the end of the antenna that insists on the RF connector inside of the phone).